Category Archives: Victorian Sci-FI

In Her Majesty’s Name (27/05/13 – Tom)

Special Branch

Special Branch

My son Tom was home for the Bank Holiday weekend and wanted to fit in a beer festival in Crowborough, going to see the new Star Trek film and a game of “In Her Majesty’s Name” (after being wowed by the demo game a Salute) – happy to say we achieved all three, though a long day at the beer festival on Saturday made me want to sleep most of the day Sunday :-). In the end, on Sunday I built three 4Ground buildings for Muskets & Tomahawks (practice for building the warehouse for IHMN which is coming for my birthday and looks difficult!) and we played IHMN on Monday before and after going to see Star Trek.

The factory

The factory

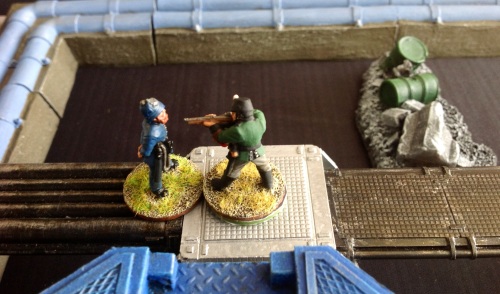
For a change we left the Middle East (especially as the Scotland Yard company was getting its first outing) and located the game in a factory, with a mess of platforms and pipework. In recognition of how dangerous an environment this could be, we said that any miss of a figure within 3″ of pipework, the 2 silver steam tanks and the huge steam boiler in the middle of the board would roll a D10 – any result of 10 would cause an explosion as per the dangerous terrain rules on pg 22 giving an automatic hit on any figure within 6″ of the strike point. Tom opted to run the Fuzz while I had my first try at playing with the Prussian Society of Thule. Our scenario was the set-up 2 from pg 50, putting 6 objective counters within 12″ of the centre point of the table and not within 4″ of each other, the twist being that 3 of the counters were dummies, while the other 3 were worth 20 VP each. Each enemy figure was worth 2 VP if taken out of the game, whereas a leader counted as 5 VP.

Scotland Yard

The rest of the Scotland Yard company

We played with the Scotland Yard list which came with the boxed set. In the list, as well as being Fearless, Holmes has Erudite Wit (he is -1 to hit in melee & shooting if within 12″); Intuitive (+3 to armour first time shot at during game); Martial Arts (+1 to FV and +1 to speed – very much in keeping with the new film character). Dr Watson has Marksman (ignore cover) and Medic (useful to revive casualties). Both Holmes and Watson have Faraday coats giving 11 armour v Arc weapons. The Chief Inspector was Fearless while the Sergeant was Tough (adding +1 to pluck rolls for shooting and melee). After the game, Tom costed out the supplied lists with the amended points values from the errata and Scotland Yard came out way down on points – he made it 68 less than the Prussians, so significant in a 250 – 300 point game. If we’ve got this right I need to source some more Bobbies or wait until North Star allow you to buy them separately.

Scotland Yard advance

Scotland Yard advance

Both sides ran like mad for the objectives in turn one, and even the Prussian Jagers with their healthy shooting values made little impact.

Initial Prussian moves

Initial Prussian moves

In turn 2, objectives were still the priority, but even stationary Jagers struggled to hit. In an attempt to stop him shooting, a Bobby unwisely charged a Jager who had captured an objective on the pipe walkway. As the Prussians had the initiative and struck first, the Bobby died quickly, bayoneted on a roll of 10.

This is only going to end one way....

This is only going to end one way….

By turn 3, we had uncovered all 6 objectives, and I knew Scotland Yard had 2 as I had 1 and 2 dummies – he did have to get them off the board yet though. The last one to be uncovered was on top of the pipes – the Bobby who uncovered it didn’t last long up there, felled by a long range Jager shot.

Copper bags an objective

Copper bags an objective

As a delaying tactic, Dr Watson led an advance against Kobalt and 2 Jagers, but was gunned down mercilessly by a volley (a pluck roll of 1 against the Prussian volley). In response, the Chief Inspector pistolled one of the Jagers who had contributed to the volley and the first Todtrupper was born.

The first zombie

The first zombie

Unfortunately for me, though I won the initiative for the next turn, when I charged the Bobby holding an objective counter with my zombie he failed his pluck and ran away taking the damned counter with him (which was probably what he was going to do on his turn anyway :-(). The Chief Inspector and the Special Branch man moved to confront the zombie, and Holmes charged Dr Kobalt in an attempt to take out an Arc generator.

Holmes takes on 3 Prussians

Holmes takes on 3 Prussians

In a stunning round of shooting the Prussians took out the Sergeant and another Special Branch man. On a roll Krieg decided to fire his flame thrower into the fight between the Chief Inspector, Special Branch man and zombie, but missed the 2 enemy figures and set his own zombie of fire – struggling to put out the flames, the zombie was defenceless but the Chief Inspector and the Special Branch man just couldn’t finish him off.

Flaming heck!

Flaming heck!

Holmes did succeed in taking down Dr Kobalt, but paid for it next turn when all the Erudite Wit in the world couldn’t save him against 2 Jagers’ roll of 10. Krieg also got his eye in and managed to miss his own zombie and kill the Chief Inspector before being shot by a Special Branch man. Luckily for Scotland Yard they managed to move their 2 objective counters off the board, as all their characters were down and there was nothing to stop the rampaging Prussians taking back the counters if they could catch the unfortunate Bobbies. It ended up as a pyrrhic victory for Scotland Yard by 47 to 34, but in terms of casualties the score came out at 24 to 7 to my Prussians – lucky it wasn’t a death match really :-).

I’m still impressed by the rules, but a bit puzzled that the Scotland Yard company as bought is nowhere near the points value of the other companies – I hadn’t bothered to work this out  (just assumed they were around about the same) but given his Warhammer background, my son did :-). I assume that it came down to having 11 figures in each box set in the end, but I for one wouldn’t have minded paying a bit extra to get a “balanced” force, and I’m loathe to buy another boxed set just for the 4 Bobbies. Also, this company has 4 figures with leadership, while the rules say you can only have 2 with that trait per company – good for the Prussian VP total, but contrary to the rules as written.

I’m also thinking for  and scenario balance, given the size of this game, the objective counter VP should come down to around 15 points each (and maybe even 10) in an attempt to give the side which only captures 1 objective counter a fighting chance of victory by killing more enemy models – either that or having a fixed number of turns before anyone can exit the table with an objective. There was nothing to stop Scotland Yard running all their troops from the table after capturing the 2nd counter as there was no way the Prussians could get anywhere near the 40 points this would has scored, but luckily my son is a good sport and hung around long enough to try out the rest of the rules (it could have been a very short game otherwise).

Lava pit

Lava pit

In Her Majesty’s Name (12/05/13 – Nick)

Last weekend we had another great game of IHMN, this time replacing the Servants of Ra with the Society of Thule (played by Nick) while I stuck with Lord Curr’s lot. The scenario was based on “Rescue the VIP” from the rulebook, except that the VIP was on a boat on the far side of the table and so could exit from the friendly side of table when rescued rather than having to go the whole way back to the start point.

VIP Objective

VIP Objective

Plans were hatched, and I as Lord Curr decided to split my forces – Lord Curr with the MG and a couple of shotguns would engage the Prussians in an attempt to slow them down, whilst everyone else would make a mad run for the VIP’s boat – their was no point lingering in cover as the Jager’s Marksman ability would ignore that. The Prussians faced a challenge in this scenario as Stroheim (their leader) and Dr Kobalt both carry the arc generators needed to animate the Todtruppen and as a result they can’t run – also, the Jagers have to stay within 8″ to be re-animated when killed, so the Thule plan had to accept that Curr’s Company would probably get to the VIP first – their plan was to kill as many as possible on the way there and block their escape route when they tried to escort the VIP to safety. Given that Thule also started with only 7 men on the table (and thus less activations), this was going to be interesting. The board set-up was much the same as last time, with Curr’s Company starting in the right hand corner and the Prussians in the left.

Board Layout

Board Layout

Lord Curr won initiative (naturally- wot?) and the game started off with Lady Felicity, Mad Mick & 5 Incorrigibles dashing for the boat covered by the MG, while Lord Curr and 2 shotguns moved though the building and on to the roof ready to provide covering fire. In response, the Prussians moved Dr Kobalt and 2 Jagers into the building opposite and moved the rest of their force towards the boat at what can best be described as a slow jog.

Lady Felicity to the rescue

Lady Felicity to the rescue

Because everyone was shooting at running targets or had moved themselves, shooting was fairly ineffectual in the first turn. On turn 2 (with Prussian initiative) the companies’ moves continued to plan, and in the shooting phase Mohan Singh drew first blood by gunning down a Jager at maximum range on a roof miles away. The Prussian Jagers, even with their Marksman ability ignoring cover rolled ineptly and the shooting phase ended with Curr arc-rifling another Jager – however, 2 Todtruppen now rose from the ground.

Zombie!!

Zombie!!

Over the next 2 turns, this zombie climbed down from the roof of the building and up onto the building Lord Curr was sniping from.

Lord Curr takes on a zombie

Lord Curr takes on a zombie

In response to the Todtruppen attacking Lord Curr, Mohan Singh moved into position to machine gun down the good Dr Kobalt, reasoning that without an arc generator the zombies would soon stop being annoying – he fluffed his shooting roll though, as did Dr Kobalt in response but the one remaining Jager to fire came good, taking Singh out at maximum range despite the barrels he was hiding behind and the fact Singh had moved.

Singh fluffs it

Singh fluffs it

Stroheim’s grin was short-lived though, as the 2 Incorrigibles on the roof volleyed their shotguns into Dr Kobalt and he fell lifeless to the ground, along with the Todtruppen fighting Curr (Stroheim with the other Arc Generator was over 8″ away). To add insult to injury, a now unencumbered Lord Curr with a lifeless Todtruppen at his feet arc-rifled the Jager behind the wall opposite – with no arc generator to re-animate him he stayed down – Lord Curr and his companions had wiped out the Thule flank force with just the loss of Singh.

Meanwhile in the centre of the board, Lady Felicity and Mad Mick had stopped to confront Feldwebel Krieg  – a bad idea as it turned out! I hadn’t read the rules for flamethrowers, so the news that they ignore armour and that even if you make your pluck roll after a hit, your figure has to miss a turn to put out the flames or take another pluck roll next turn came as a bit of a shock 😦

Kreig's barbie

Kreig’s barbie

The result was wholly predictable – with his SV of +2 Krieg was able to target both my figures and rolled a 9 and a 10 to hit! In response, I rolled a 2 and 3 for pluck, and both figures (and 64 points) went up in smoke. (Mad Mick has a pluck re-roll due to his Fanatic trait, but we ruled that this only applied to morale checks not saving against shooting – we could be wrong though :-))

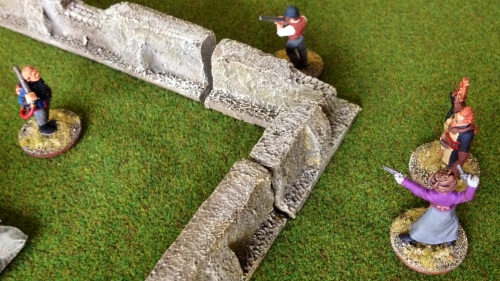
Krieg is shotgunned

Krieg is shotgunned

Enraged, an Incorrigible with a shotgun who had a clear shot on Krieg managed to take him down even when his Tough attribute bonus was added.

The rescue

The rescue

Next turn, 2 Incorrigibles reached the VIP and started to escort him to safety. Around the fountain, the Incorrigibles tried to delay Stroheim and his 2 remaining figures long enough for the VIP to escape, but not before a Jager could get a shot in – he rolled a 1 followed by another 1, so his gun had jammed and was out of action – this left Stroheim’s Mauser as the only ranged weapon available to the Prussians. Lord Curr and his 2 shotguns raced to join in the melee – just as well really, as the Todtruppen and Stroheim downed the 2 Incorrigibles they were engaged with.

Final melee

Final melee

There was now no stopping the VIP as Lord Curr and his 2 remaining Incorrigibles threw themselves in front of Stroheim’s Mauser and 1 Incorrigible left the board with the VIP. The melee went badly for Curr and though he survived, both his escorts were killed. In what would be the final turn, both Lord Curr and Stroheim were able to fire their pistols in the shooting phase – though Curr missed, Stroheim managed to hit and Curr only equalled his pluck, so he went down. At that point, we ruled him captured and that gave the final 5 VPs to the Prussians.

Lord Curr is captured

Lord Curr is captured

It ended in a pyrrhic victory for Lord Curr by 27 points to 23 – in a very close game, ten of his company had gone down with only the VIP escort surviving. The Prussians got victory points for all of these figures, but we didn’t give Lord Curr’s Company points for just killing the Jagers – they had to kill the Todtruppen as well (not sure if this is right or not). Man of the match was the Todtrupper who rampaged through the fountain area – he was responsible for taking down 4 Incorrigibles and was still “alive” at the end with one wound remaining.

This was certainly more fun than a solo game and though I’m sure we messed up some rules (volleying and shooting at groups spring to mind :-)), this didn’t spoil the fun. Once again, Mad Mick didn’t get to use his grenades so we didn’t get to try out those rules, but I’ll certainly be more wary of  flamethrowers in future! Next time we’re hoping to lay on a 3-player game featuring the newly-painted Scotland Yard Company in a London setting, so looking forward to that.

In Her Majesty’s Name – part 2 (06/05/13 – Solo)

Knowing Lady Felicity and her escort were the only figures eligible to fire, and that they would soon have him in their sights, Professor Abir cast Zone of Shadows and succeeded (just – rolled a 3, which was exactly what was required). Lady Felicity’s shot became impossible, even when adding the rifleman escort as volley fire and adding her SV of +4 concentrated in a single shot. She couldn’t hit the Professor as the rules don’t count 10 as an auto-hit – an impossible shot is impossible – and the 10 needed to hit a mere Cultist wasn’t achieved either.

Mad Mick fights for his life

Mad Mick fights for his life

Mad Mick couldn’t fire his Arc Pistol in close combat for fear of electrocuting himself (not THAT mad), so had to engage the Cultists with the butt of his Arc pistol. In the end, neither Mad Mick nor the 2 Cultists (with +1 for a club and +1 for outnumbering Mad Mick) could score a hit, so the game moved on to the next turn. Melee is handled in the same way as shooting, in that each figure has a fighting value (FV) ranging from +0 to +4 (the Pharaoh), to which is added the modifier for the weapon used along with any talents/mystical abilities and a D10 roll trying to equal or beat the armour of the target. There is a choice to be made between taking the outnumbering bonus (each figure adds +1 to their roll) or mobbing (where one roll is made and each figure adds +1 to the roll up to a maximum of 3 extra). In the Cultists against Mad Mick melee it was better to take the +1 to each roll, but if there were 4 then the +3 to 1 roll might have been better.

Around the fountain, the club-armed Cultists piled in numbers in an attempt to mob and take out Mad Mick and in response the rifle armed Incorrigibles piled in to help. The 2 pistol armed Cultists lined the wall hoping to shoot Lord Curr in the back, but Mohan Singh moved to cover them with his MG, while the shotgun armed Incorrigibles stood their ground to take an aimed shot at them. Sairah ducked down into the boat to make Lord Curr’s shot more difficult (I counted the boat as -3 cover). Before Lady Felicity could move, the Pharaoh cast Mesmerism in an attempt to make her escort attack her. The cast succeeded and the escort failed his Pluck roll, so he charged Lady Felicity.

Reel around the fountain

Reel around the fountain

As the Servants of Ra had initiative, as their first action in the shooting phase the Professor tried to cast Zone of Shadows again to minimise the effect of shooting around the fountain – he failed this time, but not by enough to injure himself (a failed cast followed by a 1 on a D10 renders the caster prone). The MG lined up a shot along the wall, splitting the SV correctly this time 🙂 between the 2 pistol armed Cultists and ending up with an SV of +6 against each – eeek! Amazingly, one shot missed, but the nearest Cultist was torn apart by the fire. The surviving Cultist missed Singh by a mile, only to himself be torn apart by a volley from 3 shotguns – things were looking bad for the Servants of Ra, though Lord Curr’s arc rifle missed Sairah.

In the melee phase, thanks to the intervention of the Incorrigibles, Mad Mick survived again, with the only casualties being the outnumbered Cultist and Lady Felicity’s escort, who the good Lady had to flatten as he was under the control of the Pharaoh. There was no way that the Servants of Ra could now contest the board as they were down to 5 figures, so they slipped away into the town, leaving Lord Curr’s force victorious.

After the decisive melee

After the decisive melee

As I thought, the Servants of Ra are not a good force to begin with – a lot of their strengths lie in combination of mystic powers and their mystics can each cast one in each phase, which I sometimes forgot to do. Also, I used the Mystic powers which were on the sheet included with the figures – I probably would choose other ones if I were to pick them myself. Lord Curr’s company on the other hand just blasted away and hoped for the best – my kind of chaps! I didn’t get to try out grenades from Mad Mick, but apart from that I think I tried out most aspects of the rules – I think the game experience will improve even further when I learn what the special abilities of each figure do and what tactics each company should  use. Due to the alternating activation system, the rules aren’t the best to play solo, though some sort of random chit activation would spice up the solo game no doubt.

Next time, Lord Curr will be up against these bounders – damn their hides!

Prussians

Prussians

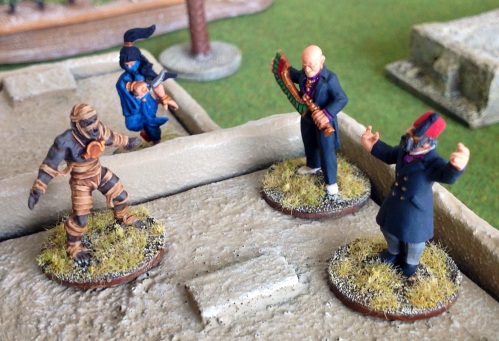
Todtruppen - (un)dead Prussians

Todtruppen – (un)dead Prussians

I bid you good day.

In Her Majesty’s Name – part 1 (05/05/13 – Solo)

The rules of play - wot!

The rules of play – wot!

I was lucky enough to pick up a copy of the rules with my pre-ordered troops from North Star at Salute a few weeks ago, and in a fit of painting completed two of the factions in record time. I probably didn’t pick the best faction for a learning game in The Servants of Ra, but the Prussian Society of Thule troops aren’t quite finished yet, so the Servants will be facing off against Lord Curr’s Company (which includes a lady in an armoured bodice and a Sikh wielding an HMG on his own!)

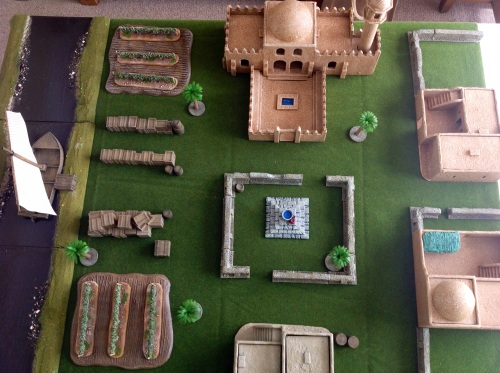
The scenario is adapted from the rules, in that the factions are vying to get to the boat first and escape, but without the flood/lava flow pursuing them across the board (advancing at a random distance each turn) . Being as how the Servants of Ra call Egypt home, this learning game is set there amid the hovels, palm trees and vineyards(!) bordering the great river Nile.

Board Layout

Board Layout

The figures from North Star are really well sculpted, though with a few mould lines, but I managed to clean these up fairly easily – I really enjoyed painting these figures up which is unusual for me as normally I find it a chore.

Lord Curr's companions

Lord Curr’s companions

At first glance, the companies will play really differently – Lord Curr’s company seems to have all the long range guns while the Servant’s of Ra have mystic abilities. The boxed sets come with a handy little QRF with all the abilities, powers and equipment of the supplied figures printed on them.

The forces of evil

The forces of evil

The companies deployed on the corners of the board furthest from the river, then rolled for initiative to see who would move a figure first. The Ra folk won, and moved Sairah (the Lady assassin) a full 12″ towards the waiting boat – normally a figure can move 6″ or run 9″ plus a movement bonus if they have it. Sairah has a movement bonus of 2″, so could run 11″, though because of crossing a low wall, this would be reduced to 10″. Terrain works in a clever fashion in that there are 3 levels of terrain, and the number of the terrain is the factor which is applied to movement and shooting – a low wall is type 1 terrain so reduces movement by 1″ and gives a +1 cover save – simple. Sairah has an ability called “Path of Shadows” which, if she matches or beats her “Pluck” (think morale, where the lower the number the better) of 3 on a D10, allows her to move 12″ and ignore terrain – if she fails the roll she can do nothing. She succeeded, and in response to this, Mohan Singh jumped over a wall and set up his machine gun behind some barrels ready to greet the mob of Cultists.

Mohan Singh

Mohan Singh

Lord Curr’s plan, for what it was worth, was to cover his advance with the MG and riflemen, while he and his shotgun armed troops would rush the boat. Meanwhile Lady Felicity and one of his rifle armed troops would attempt an outflanking movement through the maze of houses.

Outflanking move

Outflanking move

The Servants of Ra were obviously hoping to gain control of the boat through Sairah and slowly move up as a mob to join her, killing a few of the opposition on the way.

Lord Curr's plan develops

Lord Curr’s plan develops

By the end of the movement phase, there were plenty of targets for the MG and rifles, but seeing what was coming their way Professor Abir tried to cast “Zone of Shadows”, giving himself and every figure within 6″ a type 3 terrain cover save – unfortunately, he flunked the Pluck roll and 7 Cultists were left exposed to the fire in the open. Firing is conducted by using each figure’s basic shooting values (SV) modifying it by the weapon used (a rifle gets +3 while and MG gets +5) then amending by cover and whether the firer or target had moved – this figure is then added or subtracted to a D10 roll and if the number beats or equals the target’s armour value, it’s a hit – sounds more complicated than it is :-). The armour value of a Cultist is 7 (basic clothing), but as they and the riflemen had both moved, the overall factor was -1. However, 2 out of 3 rifles rolled a 9 which resulted in 2 hits. After a model is hit, it must roll greater than its Pluck – equal and it is knocked down, less and it is dead. The Cultist had a pluck of 6, but a rifle subtracts a further 1 from Pluck, so they needed over 7 but both failed and went down.

The Cultist mob draws fire

The Cultist mob draws fire

Then it was the turn of the MG. There is another interesting mechanic for MGs called “walking fire” where the shooter can split the SV of the weapon over any number of figures within 2″ – I chose to split the +5 over 3 figures, giving a +2, +2 and +1. However, bad rolling saw only 1 hit, and even with the MG’s pluck modifier of -2, the roll was made. (Thanks to Dewbakuk on the Lead Adventure Forum for pointing out that I got this wrong – it’s the SV of the shooter, not the weapon which is used. In this case, the shooter has an SV of +3, so can split his fire against 3 figures at +6 – SV of +1 plus +5 SV of MG).

This ended the turn, and Lord Curr won the roll for initiative for turn 2. Alternating moves saw Lord Curr and his shotguns with Mad Mick the Engineer move towards the boat, while the remaining Cultists and the Professor ran to get out of line of sight of the rifles and MG.

Sprint for the boat

Sprint for the boat

While Lady Felicity and her escort crept through the hovel, the Pharaoh and Mummy priest pealed off from the mob to give them an unpleasant surprise. Sairah continued her sprint for the boat.

Skulking Pharoah

Skulking Pharoah

In the shooting phase, the only target for the rifles and MG was the Mummy, but he would be difficult to take down, having the Numb attribute (meaning he had to ignore the first hit which killed him) and he had the “Clouding Men’s Minds” ability which meant no-one could target him unless in base-to-base contact. As the rifles were raised against him, the Mummy tried to activate his ability, but flunked the roll – never mind, he had 2 lives…then the riflemen cheated :-(. Figures with ranged weapons (but not explosive, arc or flamethrowers) close to each other can perform volley fire, which only allows one roll to hit, but adding +1 to the roll for each figure in the volley. The volley slammed into the Mummy, but he shrugged it off (Pluck of 3+, even with the +1 for rifle fire, easily achieved). The MG wouldn’t be such an easy proposition though, as Mohan Singh concentrated all its +5 SV on the Mummy. A combination of a good to hit roll, the MG Pluck modifier and a lousy Pluck roll saw the Mummy fail, but its Numb attribute meant it quickly recovered its composure. Lady Felicity saw her chance, and fired off both pistols in the direction of the Mummy – one shot missed, but the second hit. The pistol didn’t have any Pluck modifier, so the Mummy only had to roll 4+ to succeed, and even a 3 would only knock him down – he rolled a 2 – the ground opened up and the Mummy was dragged down into the pit of hell (well, actually the VP area off-board, but the pit of hell sounds so much more dramatic).

Take that!

Take that!

The Mummy-less Servants of Ra won the initiative for turn 3 and the fleet-footed Sairah made her roll to move 12″ and ended up dancing on the gangplank of the boat.

The boat is taken

The boat is taken

A flustered Lord Carr ran towards her on the boat, ending up behind some barrels, hoping to line up a shot on Sairah next turn.

Lord Curr lines up a shot

Lord Curr lines up a shot

With no targets left, the MG and rifles also started sprinting towards the boat….

Sprint for the boat

Sprint for the boat

…while Mad Mick showed how mad he actually was by stopping off for a drink out of the fountain – he was charged by 5 Cultists under the control of the Professor. Lady Felicity and her escort backed away from the skulking Pharaoh, but he would not be distracted by a mere woman (even though she had just creamed his Mummy priest) and made towards the boat where the final showdown must inevitably come.

And there we must leave it for today – will Mad Mick survive the assault of the Cultists? Will Sairah fall foul of Lord Curr’s arc rifle? Will I get even more rules wrong? Find out next time.