Category Archives: ACW

Rebel Raiders on the High Seas (09/02/14 – Nick)

This was our second play of this game so now it was my turn to suffer the frustration of being the early war Union (had it really been over 6 months since the first!!?). Luckily, C3i 27 arrived from Hexasim the day before our game so we were able to clear up a few of the rule queries from our previous game due to the updated Player Aids and FAQs included with the magazine.

The big picture

The big picture

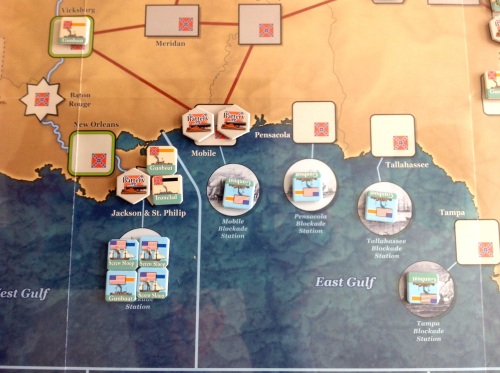
I built up the Union forces and concentrated on enforcing the blockade (badly!) until the April 1863 turn, when the Union gets 3 dice in Land Assaults (from 1 in 1861 and 2 in 1862). With the Confederates in a land battle rolling 2 dice basic plus 1 for every battery which survives the naval battle and also winning ties, going in as the Union before 1863 takes nerve, luck and a stack of good cards (which I had neglected to have the luck to draw). Added to this is that if there are any Confederate ships present in a river or sea port and the Union is attacking by water they have to be defeated before any land assault can take place.

My attempts on Charleston & St Augustine

My attempts on Charleston & St Augustine

The Union initiates attacks by expending a “cannon pawn” – basically action chits, but they only get 2 free per turn, so if they want to make the full total of 4 attacks per turn they have to have “built” 2 extra pawns in the previous turn – of course, this spending of resources stops them building the Ironclads, Steam Sloops and Gunboats to actually do the fighting.

Island no 10 and Forts Henry & Donaldson

Island no 10 and Forts Henry & Donaldson

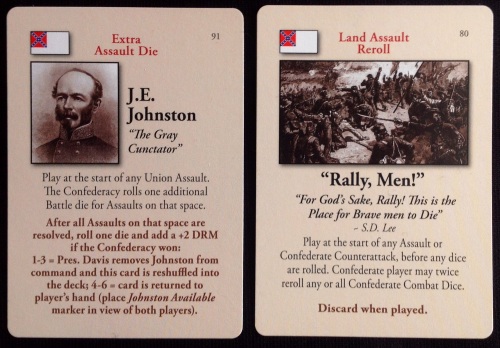
My main push was from Cairo into Fort Henry & Donelson, though I did fight a few naval actions down the East Coast, but even when I succeeded and cleared the Confederate navy out my land assault failed. I thought I’d worked out how to take Fort Henry & Donelson by sending in a force to take out the enemy batteries and ships, then sending in a second force to try and take the space through land assault, but this failed through a masterly card-combo from the Confederates. Needless to say, re-rolling any dice or all dice twice with the Confederates winning ties saw me lose the battle.

That damned card combo!

That damned card combo!

The C3i play sheet insert has an errata which limits Johnston to 1 space per movement phase, but if he succeeds in getting put back into the Confederate hand (which he did), then he can pop up anywhere on the map next turn (which he did). We got in 8 turns in 4 hours, so with 12 turns in the full game (perhaps 13 depending on a card play), we’re looking at 6 hours to finish if the game goes the full distance. I had to failed to emulate the Union capture of even 1 Confederate port in the last game (Key West), but now we have played 2 games we think that we can use the recommended 1862 scenario and we would probably get it finished. The later start to the game which places more Union forces in the Gulf of Mexico and thus gives them a better starting position might address our  queries over game balance. That said, it’s a sign of how good this game is that even while getting stuffed I really enjoyed the game. Recommended.

The stacked odds in the Gulf of Mexico

The stacked odds in the Gulf of Mexico

Cuba Libre, Rebel Raiders on the High Seas, Longstreet & Saga

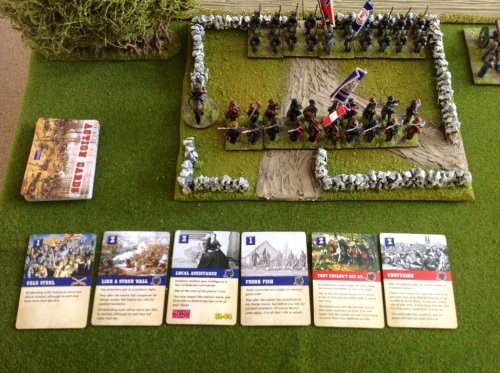
My gaming has been restricted lately due to illness, but hopefully I’m on the mend now. One casualty of this was a game of Longstreet which I started but didn’t get to finish – here are a couple of (poor) photos of that game which at least give a flavour of the cards and unit sizes.

Rebs behind a wall

Rebs behind a wall

Union advance

Union advance

Unfortunately I didn’t get to play for long enough to form a concrete opinion on the rules, but I definitely want to give them another try soon.

On a recent holiday from work, I got a few solo run-throughs of “Cuba Libre” from GMT in – though I was a bit lukewarm on “Andean Abyss” (the first game in the COIN series) “Cuba Libre” is much more my thing with a smaller map and a faster playtime. Of course, we’ll need to see how this plays out face-to-face, but I have high hopes for it.

Cuba Libre midway through a solo game

Cuba Libre midway through a solo game

Going back in time to before the long, hot summer, Nick and myself had both been given GMT’s “Rebel Raiders on the High Seas” for our birthdays in June, so it was a no-brainer to try to get it onto the table as soon as possible and we managed this in late June. It was our first trip to sea since a 7 hour marathon “1805:  Sea of Glory” game in October 2009, which we of course failed to finish – “Rebel Raiders” looked more promising in the “finish in an afternoon” category, with 3 hours being the predicted play time. It isn’t a card driven game as such, more card assisted, but gripping none-the-less. The Union have to enforce the blockade whilst at the same time trying to conquer forts and ports by sea and river – the Confederates have to send out blockade runners to bring back goods, giving them victory points which can then be spent on building ironclads, raiders or cannons for port defence.

The east coast as the Union blockade tightens

The east coast as the Union blockade tightens

The Union dice rolling was truly appalling during the game with only Key West falling in the first 2 years of the game, but despite our unfamiliarity with rules we nearly got the game completed, so for once the playtime estimate looks about right.

Cards of the coast of Florida

Cards off the coast of Florida

I have put my non-playing time to some good use by finishing my Scots and Irish warbands for Saga – expect to see these on the table over Christmas in at least one of our usual multiplayer games.

Scots Hearthguard

Scots Hearthguard

Scots Spears

Scots Spears

Irish Hearthguard

Irish Hearthguard

Next Saturday I hope to see a few Saga tournament games at Warfare in Reading, though unfortunately I won’t be playing 😦

Until next time…

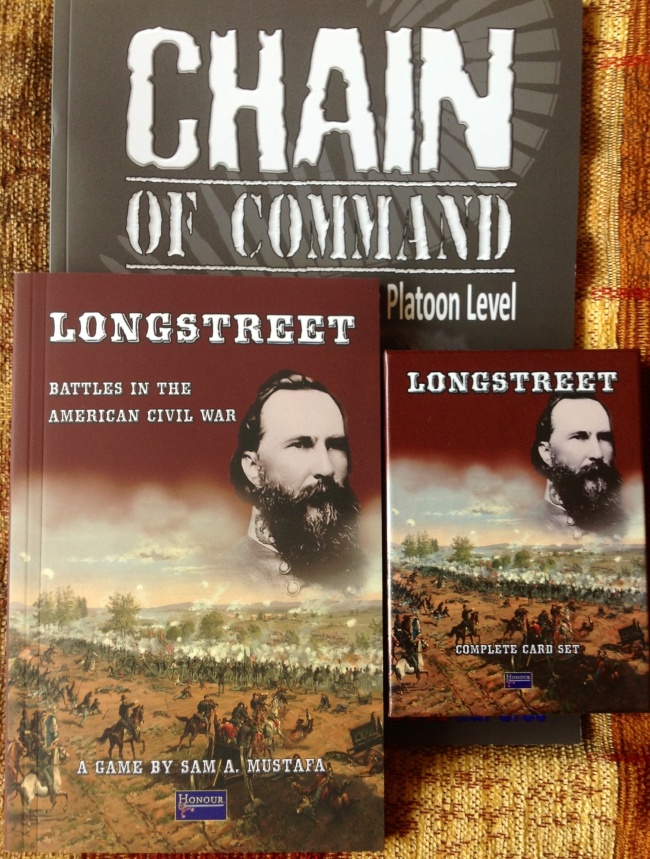
Two come along at once…..

Image

Arrived back from holiday to find these waiting for me – with the Bank Holiday looming and tomorrow looking like a wash out, surely one set will make it to the table!

Hammerin’ Iron (27/01/13 – Solo) Part 2

At the start of turn 4, the Reb fort fired at the ailing Switzerland – 6 hits took her down to 1 hit point and a critical hit destroyed the boiler so she couldn’t move anymore either. Also, as she was below one third of her starting hit points, the ship counted as “battered” so was less effective at firing, could only move 1 hex (if the ship still had a boiler!) and needed to take a morale test when activated which, if failed would force her to strike her colours and surrender.

Arkansas engages 3 Union ships

Arkansas engages 3 Union ships

With the edge of the board fast approaching CSS Arkansas needed to start turning, so with her starboard gun destroyed only her rear battery was able to fire – USS Sassacus took 3 hits from her but crucially was set on fire by the shots. USS Passaic attempted to negotiate a sandbar and succeeded (not really that risky as she had a shallow draught) and because Arkansas would be out of the battle for a while, shot at CSS Hampton before she could sink USS Switzerland – 5 hits and a critical resulted in another fire. CSS Hampton now had to tackle the fire on board before activating and luckily succeeded in putting the fire out before further damage was caused – her rear medium gun then sank the Switzerland while the front gun missed the Sassacus. Continue reading

Hammerin’ Iron (27/01/13 – Solo) Part 1

I’ve been on the verge of putting my ACW Naval ships into a Bring & Buy for a while now, but thought I’d give them one last chance with Peter Pig’s new(ish) edition of “Hammerin’ Iron” which I saw demo-ed at Salute a couple of years back. I’ve used a couple of different rule sets with these ships but can’t admit to any of them ever being much fun.

Reb initial deplyment

Reb initial deplyment

There is a comprehensive scenario generator included with the rules, but briefly there are 2 islands and 2 sandbars to be placed along with 2 objectives for the attacker to destroy (transports on the river and buildings on the shore) and a fort for the defender to use. However, the fort position is generated by the roll of 2D6 to determine which row of hexes it is placed – in this game I rolled an 8 which was the row an island was on so the fort was able to go there – this would make it even tougher for the Union as they would be under the fort’s guns from the very start. In this scenario, the attacker gets to place 3 ships (2 chosen by him, 1 by the defender) on the table, with 1 more ship arriving in turns 2 and 3 and a third ship possibly arriving on a dice roll. The defender gets 2 ships on the board at the start  (one chosen by him, one by the attacker) in a board row diced for by 2D6 but with no automatic arrivals for the rest of his fleet – he has to roll each turn, needing 9+ on 2D6 for a ship of his choice to arrive (or if he has to re-roll one of the D6 to achieve the 9, only a tinclad or wooden ship of less than 25 hit points can arrive). Also the defender has to lose one ship randomly from his force of 6 ships, but luckily for the Confederacy the random roll was for CSS Drewry (one of the 2 small gunboats) to stay at home. Continue reading