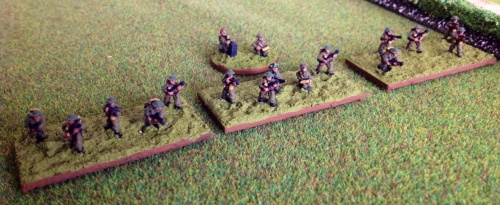
British Platoon
A couple of weekends ago, with the 70th anniversary of D-Day approaching, I was thinking I should run a Normandy game. Initially I was considering of a Chain of Command 28mm skirmish, but I’ve played a lot of skirmish games of late and wanted something bigger. Then I remembered my neglected 10mm WW2 collection and decided that a bigger battle would be more what I had in mind – but what about rules? I have been a long-time Blitzkrieg Commander player so could use them, or could use the shiny new-ish Battlegroup Overlord which were given to me as a freebie last year (thanks David!), but looking at the army lists and the way my troops were based there was going to have to be some re-jigging and figures purchased and painted and I didn’t have the time for that – further digging in the rules pile revealed that basing and extra troops would also be needed for “I Ain’t Been Shot Mum”. Then when I was checking Vassal opponent and fellow Ulsterman Sgt Steiner’s blog, I saw he had been enthusiastically playing and detailing the changes in the new version of the Panzer Grenadier rules by Dave Brown. After a few email exchanges where he took the time to explain the scale and basing scheme to me, I realised that by painting up a few command stands I would be in a position to lay on a game in time for the anniversary of the start of the Normandy campaign – off went the order to Caliver Books for an early birthday present, and here we are.
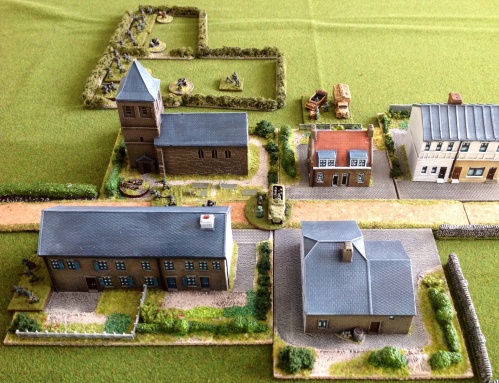
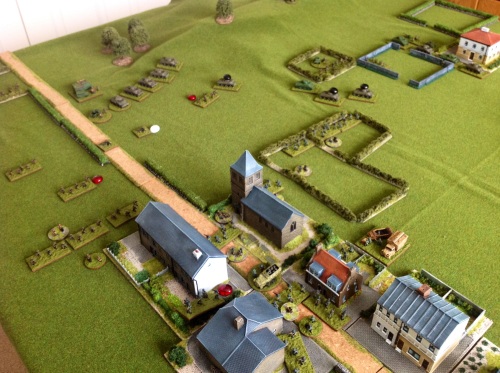
Germans entrenched in Cintheaux
Clearly the thing to do with a new rule set is to start small and get to know the rules before diving into battles with loads of tanks – not this time. I wanted all the toys on the table so I went for it. The scenario was Cintheaux from the “Battles for the West” scenario book for the 1st edition of the rules which has 3 Tigers, a Panzer IV and an 88mm against loads of Shermans, so a gentle introduction to the rules then 🙂 .
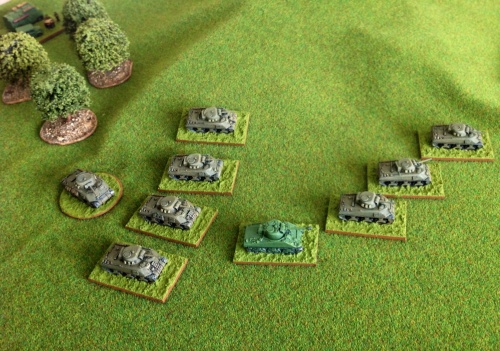
Shermans advance
On Turn 1 the Germans won initiative but obviously made British move first. The infantry platoons rapidly advanced needing the addition of 2 out of 4 impetus to keep them moving (more on command and impetus later). The rearmost platoon failed but I was unwilling to spend 2 impetus to get them moving. Just as well really, as the Shermans on the hill also failed by 2 so the impetus was spent on them. I then advanced the HQs to keep in contact with the rapidly advancing platoons – the rules emphasise Command Contact in activation rolls so this seemed like a sensible thing to do. While all this was going on the Germans had the option of defensive fire, where a player’s turn can be interrupted to allow enemy units to respond to their movements. I chose not to do this, reasoning that would give the British something to shoot at and they could activate at greater effect during their turn. Having nothing in sight to fire at, the British turn ended.

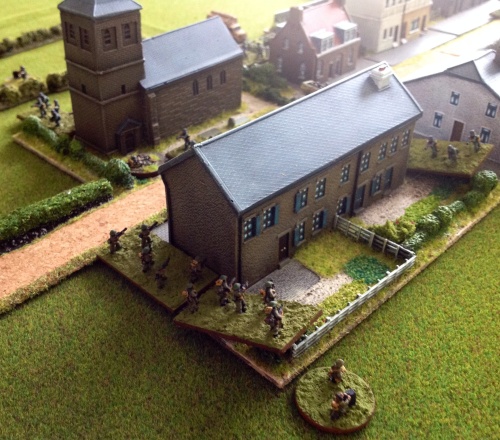
Germans in the village
The German platoon in the village activated first on a fire order. The LMG base plus one other fired at the British to the left of the village. There is a choice between concentrating fire entirely on 1 base or nominating a lead base and spreading any excess results amongst other bases within 4″. An LMG and a rifle base generated 3 section fire points and at effective rather than close range. They got a +1 modifier as the British were rapidly advancing. The total of 9 gave a disengage and a suppression test. 5 was rolled for the disengage, meaning the section had to disengage – suppressed and fall back 6″. The other section easily passed the suppression test. The MMG in the field fired at the infantry to its front – 4 sections equivalent with another result of 9 gave 2 disengage and 1 suppression targeting all 3 sections. The disengage roll was a 12 so the LMG Section immediately got to return fire, rolling another 12 causing it to disperse and leave the game – first blood to the British.

MMG dispersed
The second suppression roll was a 4 so not so good, a British stand dispersing as well, with the 3rd section suppressed (miss a turn basically). The German Company commander tried to bring in mortar fire on the same British platoon but needed to add an impetus to succeed. The accuracy roll was for a near miss, landing in open ground to the left. The Germans on the hill were the next to activate.
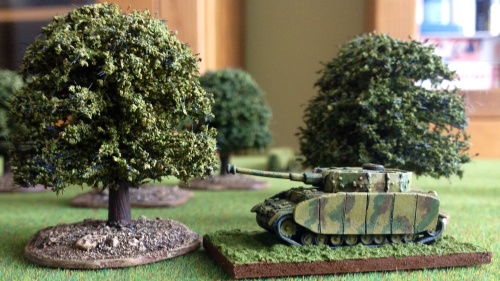
88mm in the trees
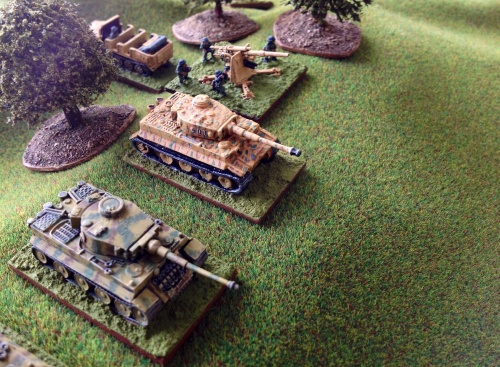
The 88mm was at long range so it was probably worth intensive firing it? Nope – one of the rolls was a 4 so the 88mm would be low on ammo for the rest of the game. The other shot hit with a 7 after range adjustment with an AT factor of 8 for a total of 15. The Sherman’s armour of 4 left a final result of 11 so a damage test and a roll of double 1 brewed it up. The Tigers on the hill could fire then move, so did so targeting the same group of Shermans – they rolled a 4 for activation so did nothing. The Panzer IV also failed to activate but on a 5 could add 2 impetus and moved off the hill to seek cover behind the copse of trees – more impetus was spent getting the inexperienced Wehrmacht platoon to run towards the village, and there the German phase ended.
Lurking Panzer IV
The initiative roll for next turn was kind to the British with a 6 rolled against 2 – this gave them 9 impetus which could come in very handy. Unfortunately no-one was in spotting range of the 88mm on the hill, but the British commander spent an impetus point to successfully call up an air attack on the village. The accuracy roll was a predictable double 1 giving a deviation 15 ” to the left of the target into the open fields beyond the village.

Wayward Spitfire
Undeterred the British tried to call in artillery support at the cost of another impetus, but failed. The flanking force of tanks and a 6pdr was out of command range, so another impetus was spent getting them to move and a further 2 spent bringing the roll up to a success.

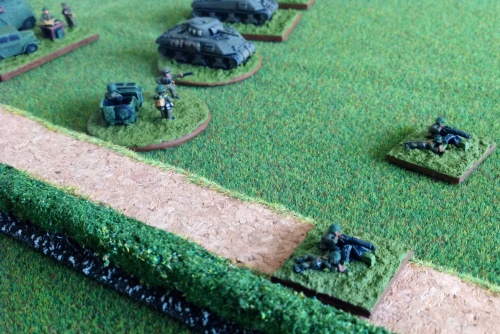
Flank attack
The remaining tanks split up, with half advancing to meet the Tigers while the other half turned their attention on the German infantry in the field. Unfortunately this allowed a panzerfaust a flank shot as a defensive fire action without activation as it was within close range. A double 6 guaranteed a hit and a 6 AT minus the side armour of a Sherman of 2 meant destruction.

Panzerfaust springs trap
The HQ had to spend an impetus to get the remaining Shermans to fire at the infantry who had just brewed up a Sherman, but 5 shots including from the company HQ did absolutely no damage. The other company HQ tried to get the MMG to lay down fire on the village by spending 2 impetus.
MMG
One MMG rolled double 1 sending it low on ammo but the other hit causing the German section to fall back suppressed. The infantry followed up to take the vacant building, triggering some defensive fire which had no effect.
British foothold in village
Taking exception to this the CO unsuccessfully ordered his mortars to fire on the village then reinforced success by committing his reserve platoon at the double (a 17″ move!). The last British impetus was spent rallying the 2 suppressed sections which meant they didn’t have to be rallied in the Morale phase and risk failing (or else by this point in the game I had forgotten there WAS as morale phase 🙂 )
The first German action was to call in the Nebelwerfers before the British got too close but couldn’t roll the 8 required to activate. The Tigers on the hill activated to move then fire, and succeeded in destroying 1 Sherman at the cost of 1 Tiger going low on ammo.
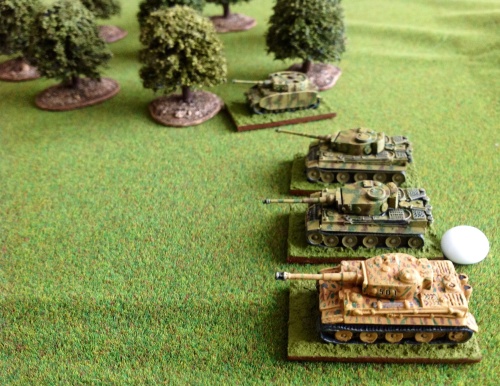
Tigers advance
However, the German squads in the field massacred the British sections in front of them, wiping out 2 and sending the 3rd running back suppressed. In the village, concentrated German fire forced back another section.

Burning Shermans litter the field
I had to call it a day there. Though the British could potentially win the tank battle, the objective of taking the village was probably unattainable due to their lack of infantry – also they would soon be forced to take 25% morale tests if they took many more losses, and these seemed inevitable when looking at the intact Tigers and strength of the German position in the village.
I had tried out most of rules (except for close assault and recon) mostly by abandoning tactics and making head-on charges at the enemy with the British. Although I hadn’t used hidden units (I couldn’t really fool myself) I did abide by the spotting rules so couldn’t shoot at units I couldn’t see or hadn’t revealed themselves. The command and control system is excellent, allowing you to mitigate a command roll which has only failed by a 1 or 2 to a degree by spending impetus (a finite resource) to make it work. Firing is detailed enough without having to roll buckets of dice to get a result, though you can find yourself having to roll 3 or 4 morale tests based on shooting outcome.
End of the battle – black beads=destroyed, red=suppressed & white=low-on-ammo
I really like these rules and playing them has made me want to play more larger scale WW2 actions. There is painting to be done before “I Ain’t Been Shot Mum” and “Battlegroup Overlord” ever hit the table, though I’m not sure I want to invest any more time in 10mm figures, so I may look at doing this on a budget with 15mm plastic from the Plastic Soldier Company.

Germans tanks on the hill


