
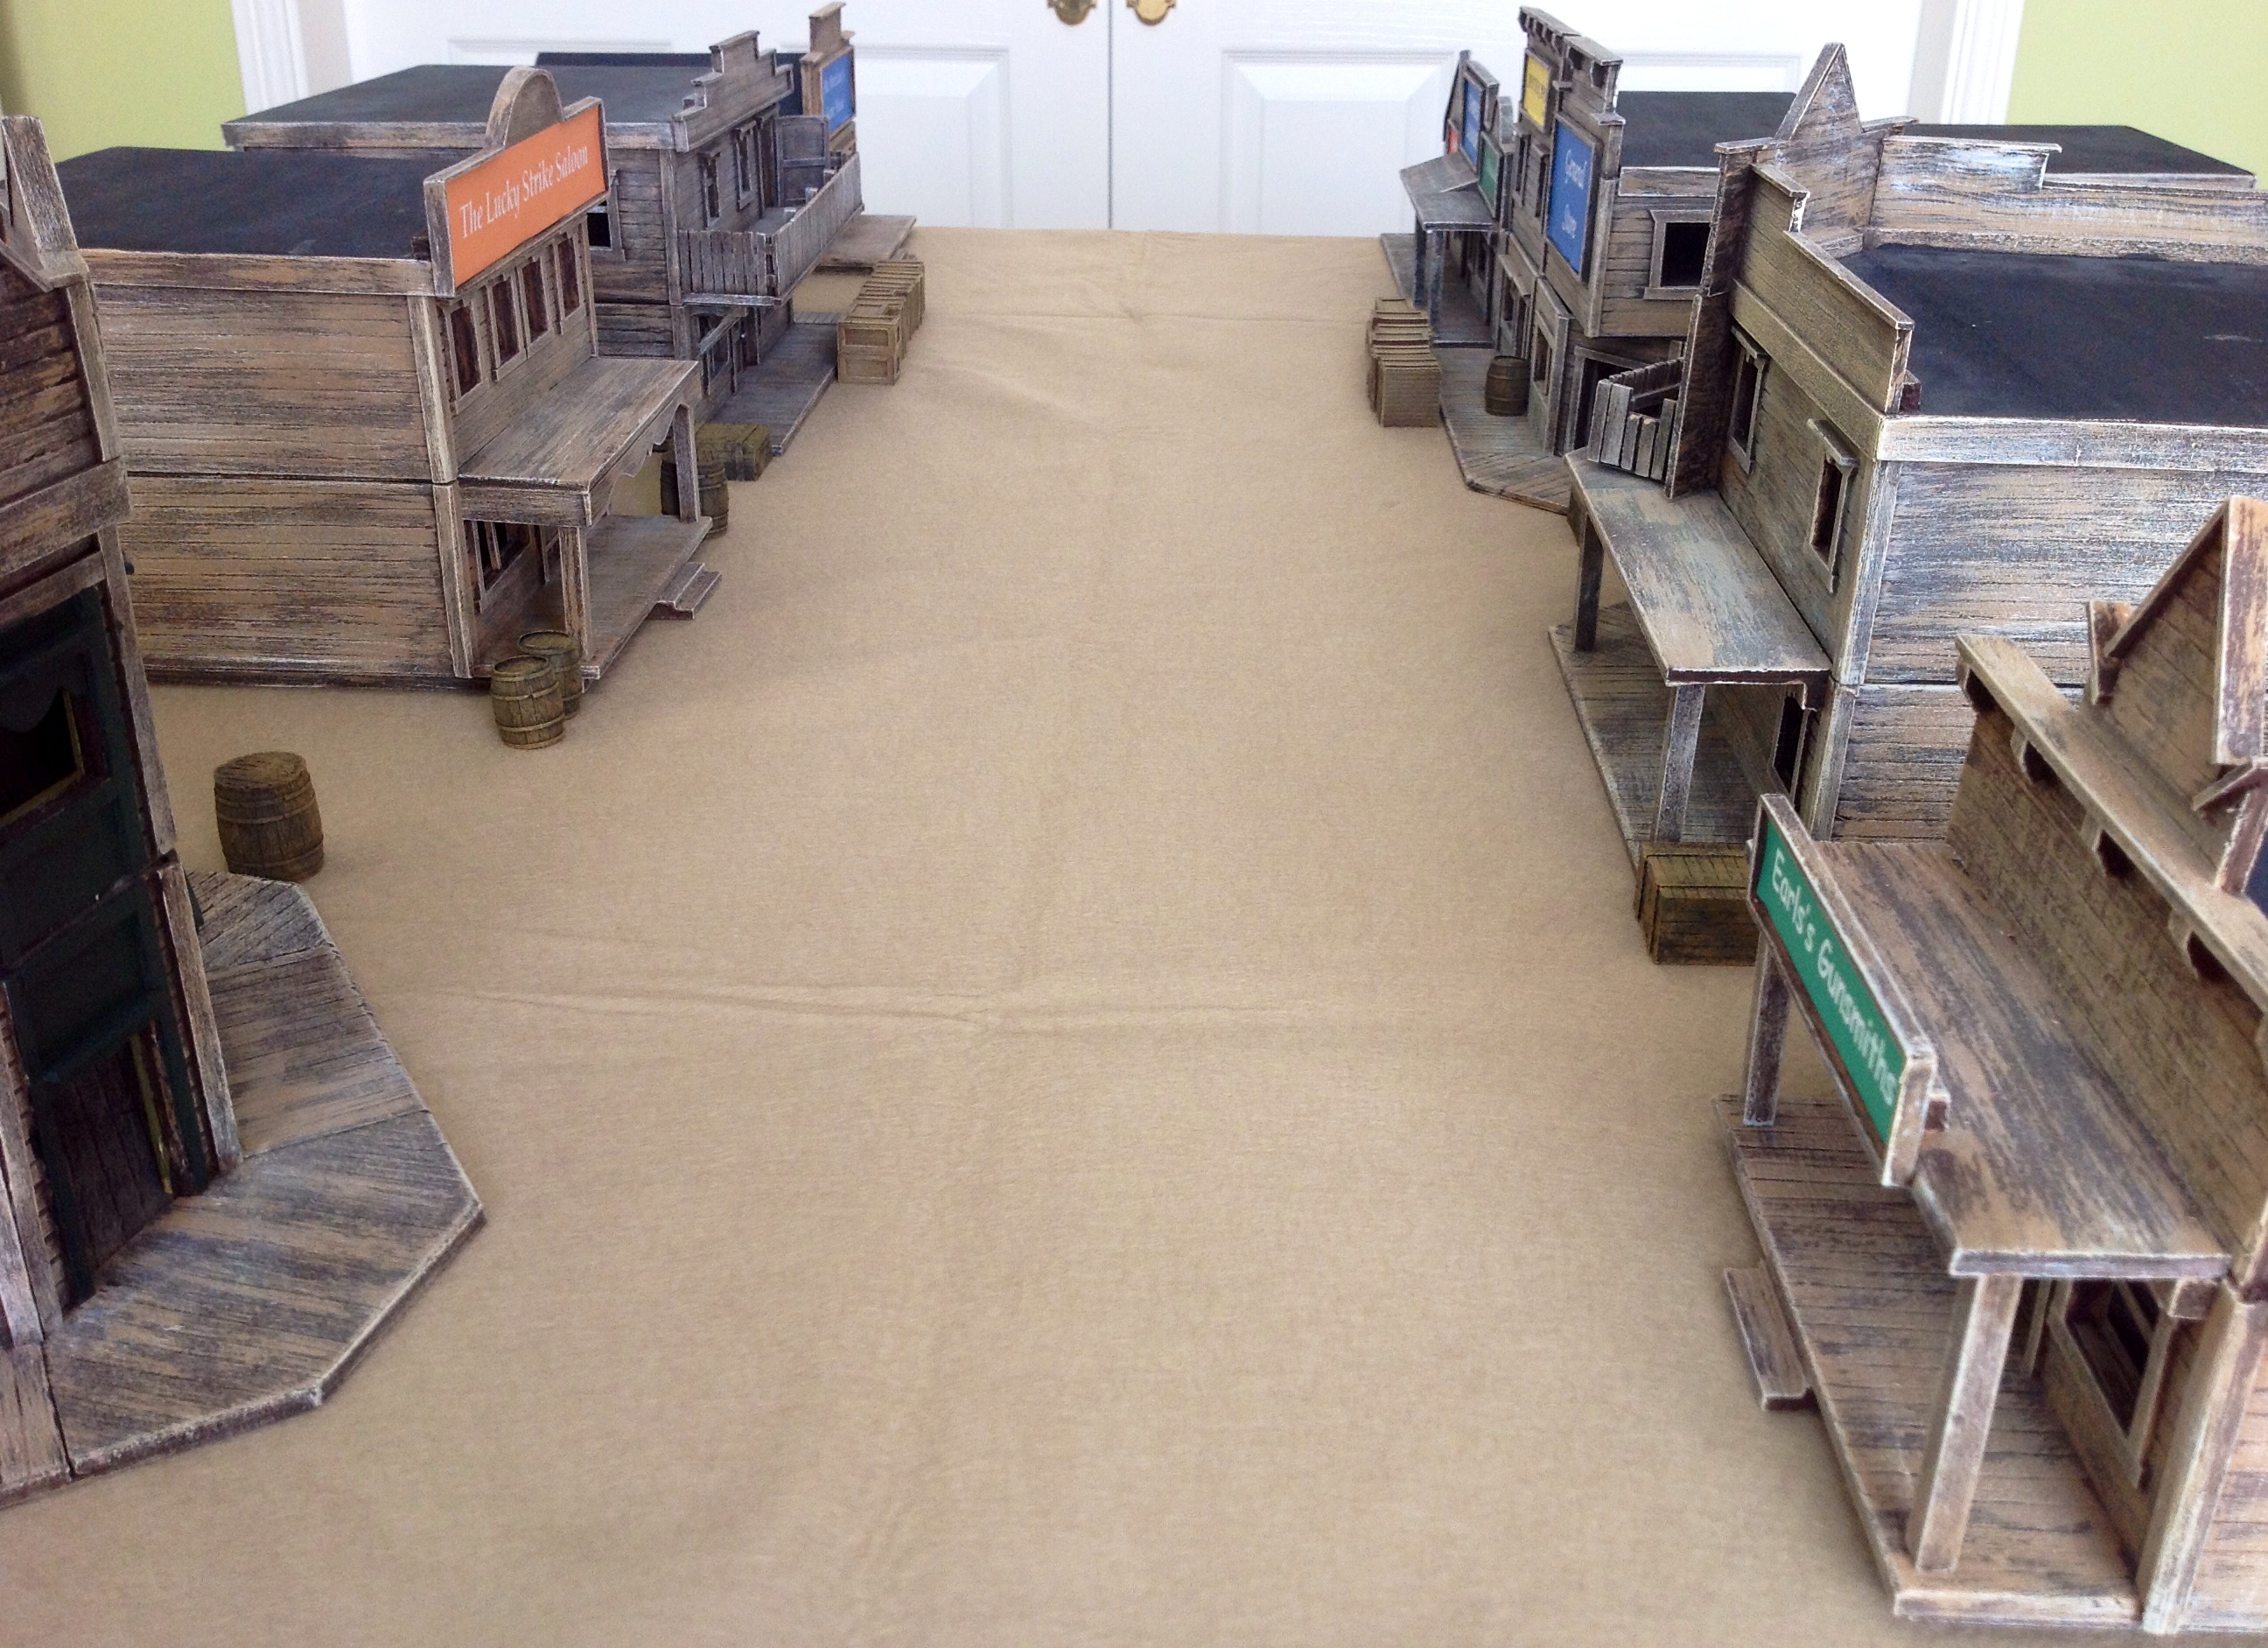
Main Street
I had picked up the “Dead Man’s Hand” rules at Salute 2013 when they were released but they never quite made it to the top of the rules pile. Then I noticed and picked up the “Legend of Dead Man’s Hand” supplement at Salute 2014 along with Renegade Indian band (I’ve always fancied a band of these ever since the Warhammer Historical Wild West rules & expansion ). I had a few days off work over Easter, so I painted them up and we were ready to give the rules a run out.

Renegades
Their opponents were the Cowboys, which were my old Foundry figures joined by the new Great Escape “John Bridges” figure as the Man with No Name (on the left of the photo).

Cowboy gang
The rules allow you to play scenarios in 3 parts (“scenes”), with the winner of the first two parts gaining advantages in the subsequent scene, but as we were in a hurry we decided to pile straight into the scenario “The Good, the Lead and the Ugly” 2nd scene, allowing us to get all our figures onto the table right away. The constraint on the Renegades was that they couldn’t activate their leader until they lost a man, while the Cowboys were “surprised” so only got to activate 3 out of their 7 figures in the first turn. Victory conditions were different for each side – the Cowboys only had to put 2 Renegades out of action to end the game while the Renegades had to down 3 Cowboys.

Under Fire
The game is card driven but in a clever way – each card is multi-use, so depending when it is drawn it is used either to determine initiative or can be played for the event. Each faction’s face card events are unique to them, while the 2-10 of each suit have standard events on them. Each side starts this particular scenario with a deck of all red or black 2-10 cards, their own face cards and a Joker, so 23 cards in all. First off, each side draws 5 cards to form a hand – these are the cards which can be used for their printed events. A nice mechanic is that if a card is played for the event it can be “trumped” (cancelled) by your opponent playing a card of the same face value – this happened to me at least twice and it can be very frustrating!
Next each side draws the top card from their deck and looks at it before allocating it face-down to one of their figures – this is that figure’s initiative value. All their other figures are given a card face-down without the player looking, and then both sides simultaneously reveal all their cards, determining which figures will perform their actions in which order.
The first turn consisted of the Renegade and Cowboy rifle-armed figures trying some long range pot-shots while pistol-armed Renegades tried to get into range but maintain some cover between themselves and the Cowboy rifles. Opportunity fire is cleverly handled – each figure normally gets 3 actions (move 10cm, aim, fire, reload/change weapon or recover) but an unactivated figure can act out of initiative sequence to perform 1 shooting action – of course, it then loses its entire turn, but what use is a turn if you’re dead?
Cowboy misses
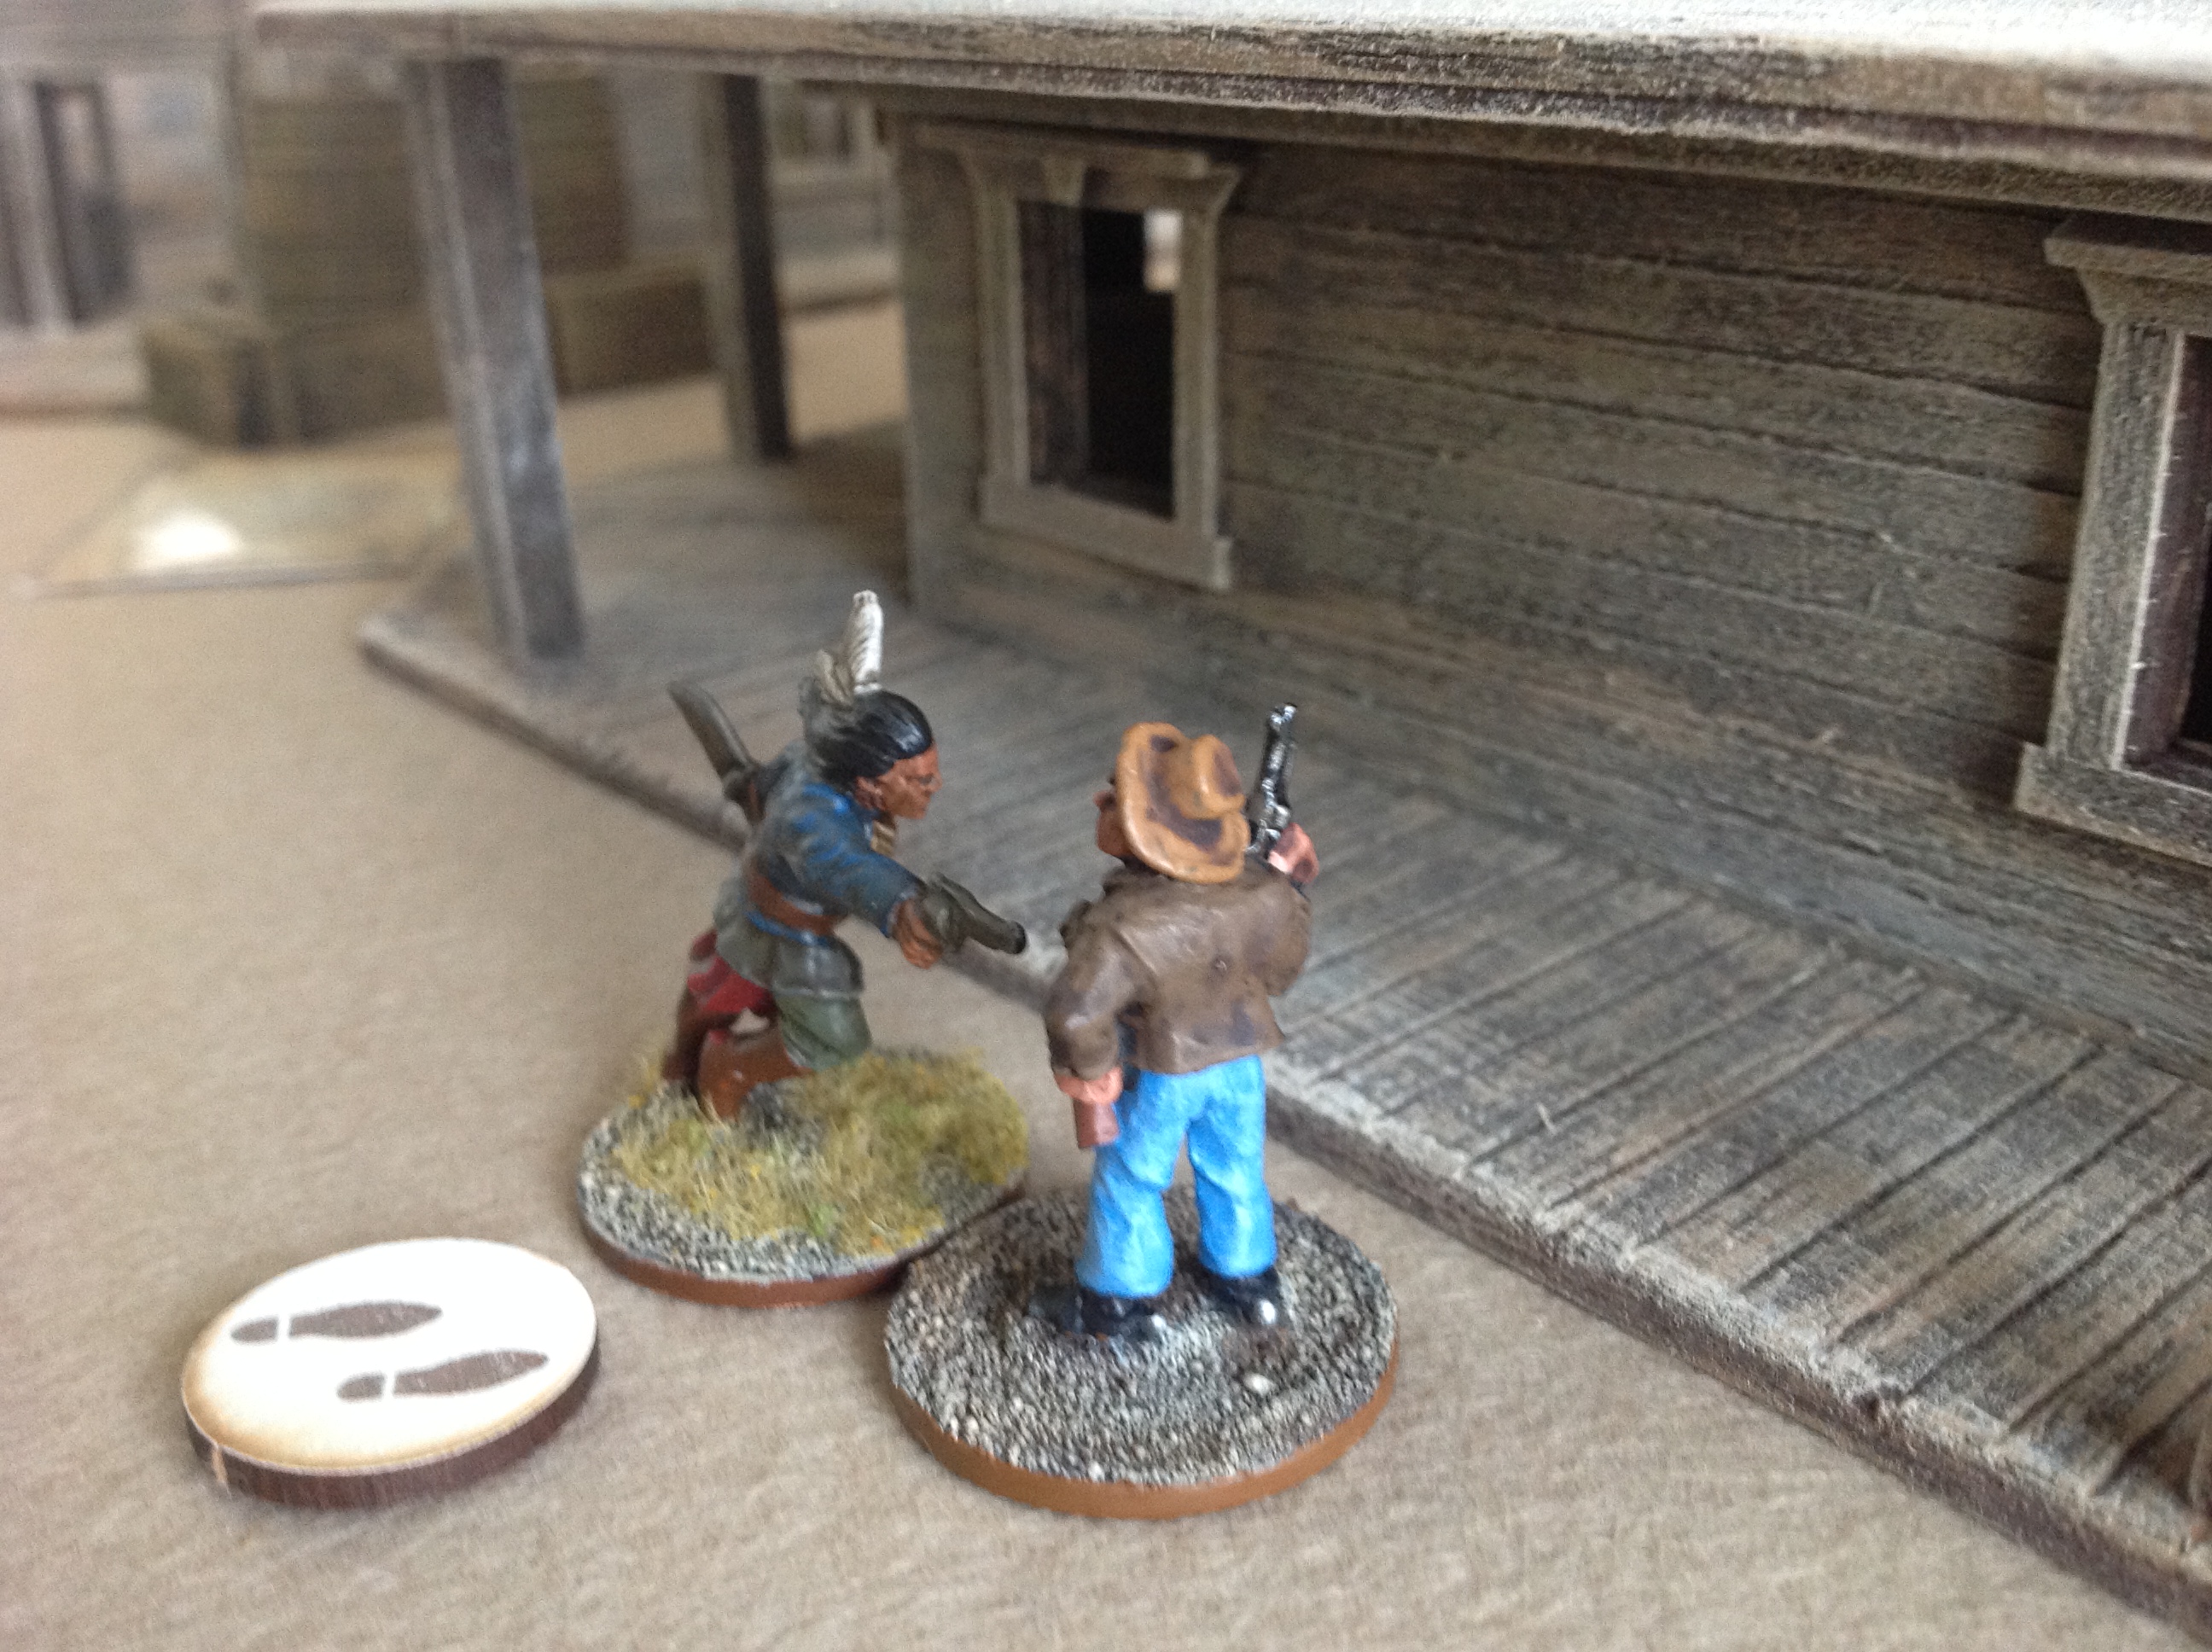
It took us both a bit of figuring out how to get into close combat (this is the Renegade gang’s strength). During a normal move a figure can’t move within 2cm of an enemy figure and can’t use 3 successive actions to get into base contact, so, though it’s not put this way in the rules, the only way to get into hand-to-hand combat is to start within 12cm – especially frustrating for the Renegades – although they do have a couple of event cards which allow them to get extra movement or ignore the 2cm rule, they didn’t come up at an opportune moment. However, one Renegade warrior did manage to close, evading a snap pistol shot from a cowboy then beating the cowboy in close combat by a difference of 5, killing him outright. Close combat is a roll of a D10 for each opposing figure with a few modifiers (including +1 for initiating the combat) – compare the totals then the losing figure takes that many “under fire” markers – in this case the loser was a normal cowboy who can only take 4 “under fire” markers before being put out of action, so 5 did the trick. Mind you, a normal Renegade gets +2 in close combat while a Chief gets +3 so they are best gunned down before they get to your figures.

Saloon fight
Bouyed up by this success, the Renegade second-in-command tried to rush my second-in-command (the Man with No Name) through the Saloon swing doors but this time my snap shot was bang on and he took a bullet in the face for his trouble – his shot (simultaneous because we were at close range) went wide. The cowboy was +4 for shooting with -2 for the Renegade moving twice but as I rolled really high, it would have been curtains for the Renegade regardless, as a modified roll of 19-20 on a D20 is an automatic “out of action” result. (shooting is on a D20 while combat and morale are on a D10). An unactivated figure being shot at can also burn their entire turn to “duck back” and move up to 10cm into cover, making the shot harder at the expense of not returning fire

No Name ends the game
Seeing a quick victory in prospect, and with my shotgun-armed cowboy having the highest initiative next turn, I moved him towards the Renegade outside the saloon and emptied both barrels of his shotgun at him, but even with a +6 DRM he managed to miss. Luckily, Man with No Name had the next highest initiative, so ducked out the saloon doors, dodged a snap shot, then managed to put a bullet in the Renegade’s head – it was game over. I did say it was a quick game – so it was, but the next scene would go on for longer, continuing until one side was wiped out or failed a “big nerve test” (only taken when over 50% of a gang is down, so 4 figures each in this case).
The previous photo illustrates well the amount of tokens that can be on the board after a few turns – the shotgun-armed cowboy has moved 1 move, is out of ammo and has one “under fire” marker – more on this later.

Face-off in the street
I got on well with the rules. I liked the activation sequence, the dual-use cards and the trumping of event cards mechanism (though I think I suffered the most from this last one). There are lots of hard choices to be made and the scenario-driven nature of the game makes it vital to remember what your objectives are. In this scenario, initial deployment was key as well – the Renegades probably should have set-up closer to the Cowboys in order to get into close combat on the first turn, taking advantage of the element of “surprise”.
Using a D20 for shooting was not popular with Tom at all (“too variable”) and even I was wondering why not just use a D10 for everything with a further roll to make shooting more granular – that said, the chaos caused by the D20 did seem to reflect the nature of contemporary gunfight accounts if not the Hollywood versions.

Cards & counters
I suppose the downside for some to the activation sequence is the need for cards and markers all over the table, but it didn’t bother me much at all. The fact that they are playing cards in keeping with the West helps and also I prefer on-table markers to markers on status cards off-table which I always forget to refer to or knock over.
The supplement released at Salute, (“The Legend of Deadman’s Hand”), contains more scenarios and a campaign system along with 4 new gangs and rules for wagons – it’s well worth having if you like the basic game. I’m wondering why it took me so long to get around to dust off the old Wild West figures and scenery and play these rules, but I’m certainly glad I did – I can see another solo campaign a-coming….
