
I’ve been on the verge of putting my ACW Naval ships into a Bring & Buy for a while now, but thought I’d give them one last chance with Peter Pig’s new(ish) edition of “Hammerin’ Iron” which I saw demo-ed at Salute a couple of years back. I’ve used a couple of different rule sets with these ships but can’t admit to any of them ever being much fun.

Reb initial deplyment
There is a comprehensive scenario generator included with the rules, but briefly there are 2 islands and 2 sandbars to be placed along with 2 objectives for the attacker to destroy (transports on the river and buildings on the shore) and a fort for the defender to use. However, the fort position is generated by the roll of 2D6 to determine which row of hexes it is placed – in this game I rolled an 8 which was the row an island was on so the fort was able to go there – this would make it even tougher for the Union as they would be under the fort’s guns from the very start. In this scenario, the attacker gets to place 3 ships (2 chosen by him, 1 by the defender) on the table, with 1 more ship arriving in turns 2 and 3 and a third ship possibly arriving on a dice roll. The defender gets 2 ships on the board at the start (one chosen by him, one by the attacker) in a board row diced for by 2D6 but with no automatic arrivals for the rest of his fleet – he has to roll each turn, needing 9+ on 2D6 for a ship of his choice to arrive (or if he has to re-roll one of the D6 to achieve the 9, only a tinclad or wooden ship of less than 25 hit points can arrive). Also the defender has to lose one ship randomly from his force of 6 ships, but luckily for the Confederacy the random roll was for CSS Drewry (one of the 2 small gunboats) to stay at home.
As the game is very much scenario driven in order to give both sides a chance at victory, it’s probably worth reviewing the victory conditions of the game. In short, the side with the most victory points wins (unless the difference is less than 6, in which case it is a draw), though the level of victory is better the greater the difference. The list of victory point awards is somewhat long:-
- Each ship has a victory point level awarded if it is sunk or stikes its colours
- Defender gets an extra 1D6, 2D6 or 3d6 VP depending on how many ships he has on the table at the start (1D6 in this game)
- Attacker gets D6+2 for each of the 4 shore building he destroys (there are 4) – easier as they will be towards his end of the table.
- Attacker gets D6+5 for each of the ship transports he destroys – harder as they are closer to the defender’s end of the table.
- Attacker gets 18 points for the destruction of the medium fort.
- Defender gets 1 point for every 2 hexes between fort and attacker’s table edge (4 hexes = 2 victory points in this case)
- Defender gets D6 points for every one of his ships which does not arrive in time to take part in the game.
- Both sides can get D6+3 if they use 0-1 ironclads.
- Each ship (max 2 ) within 3 hexes of enemy table edge at end of game earns D6-1.
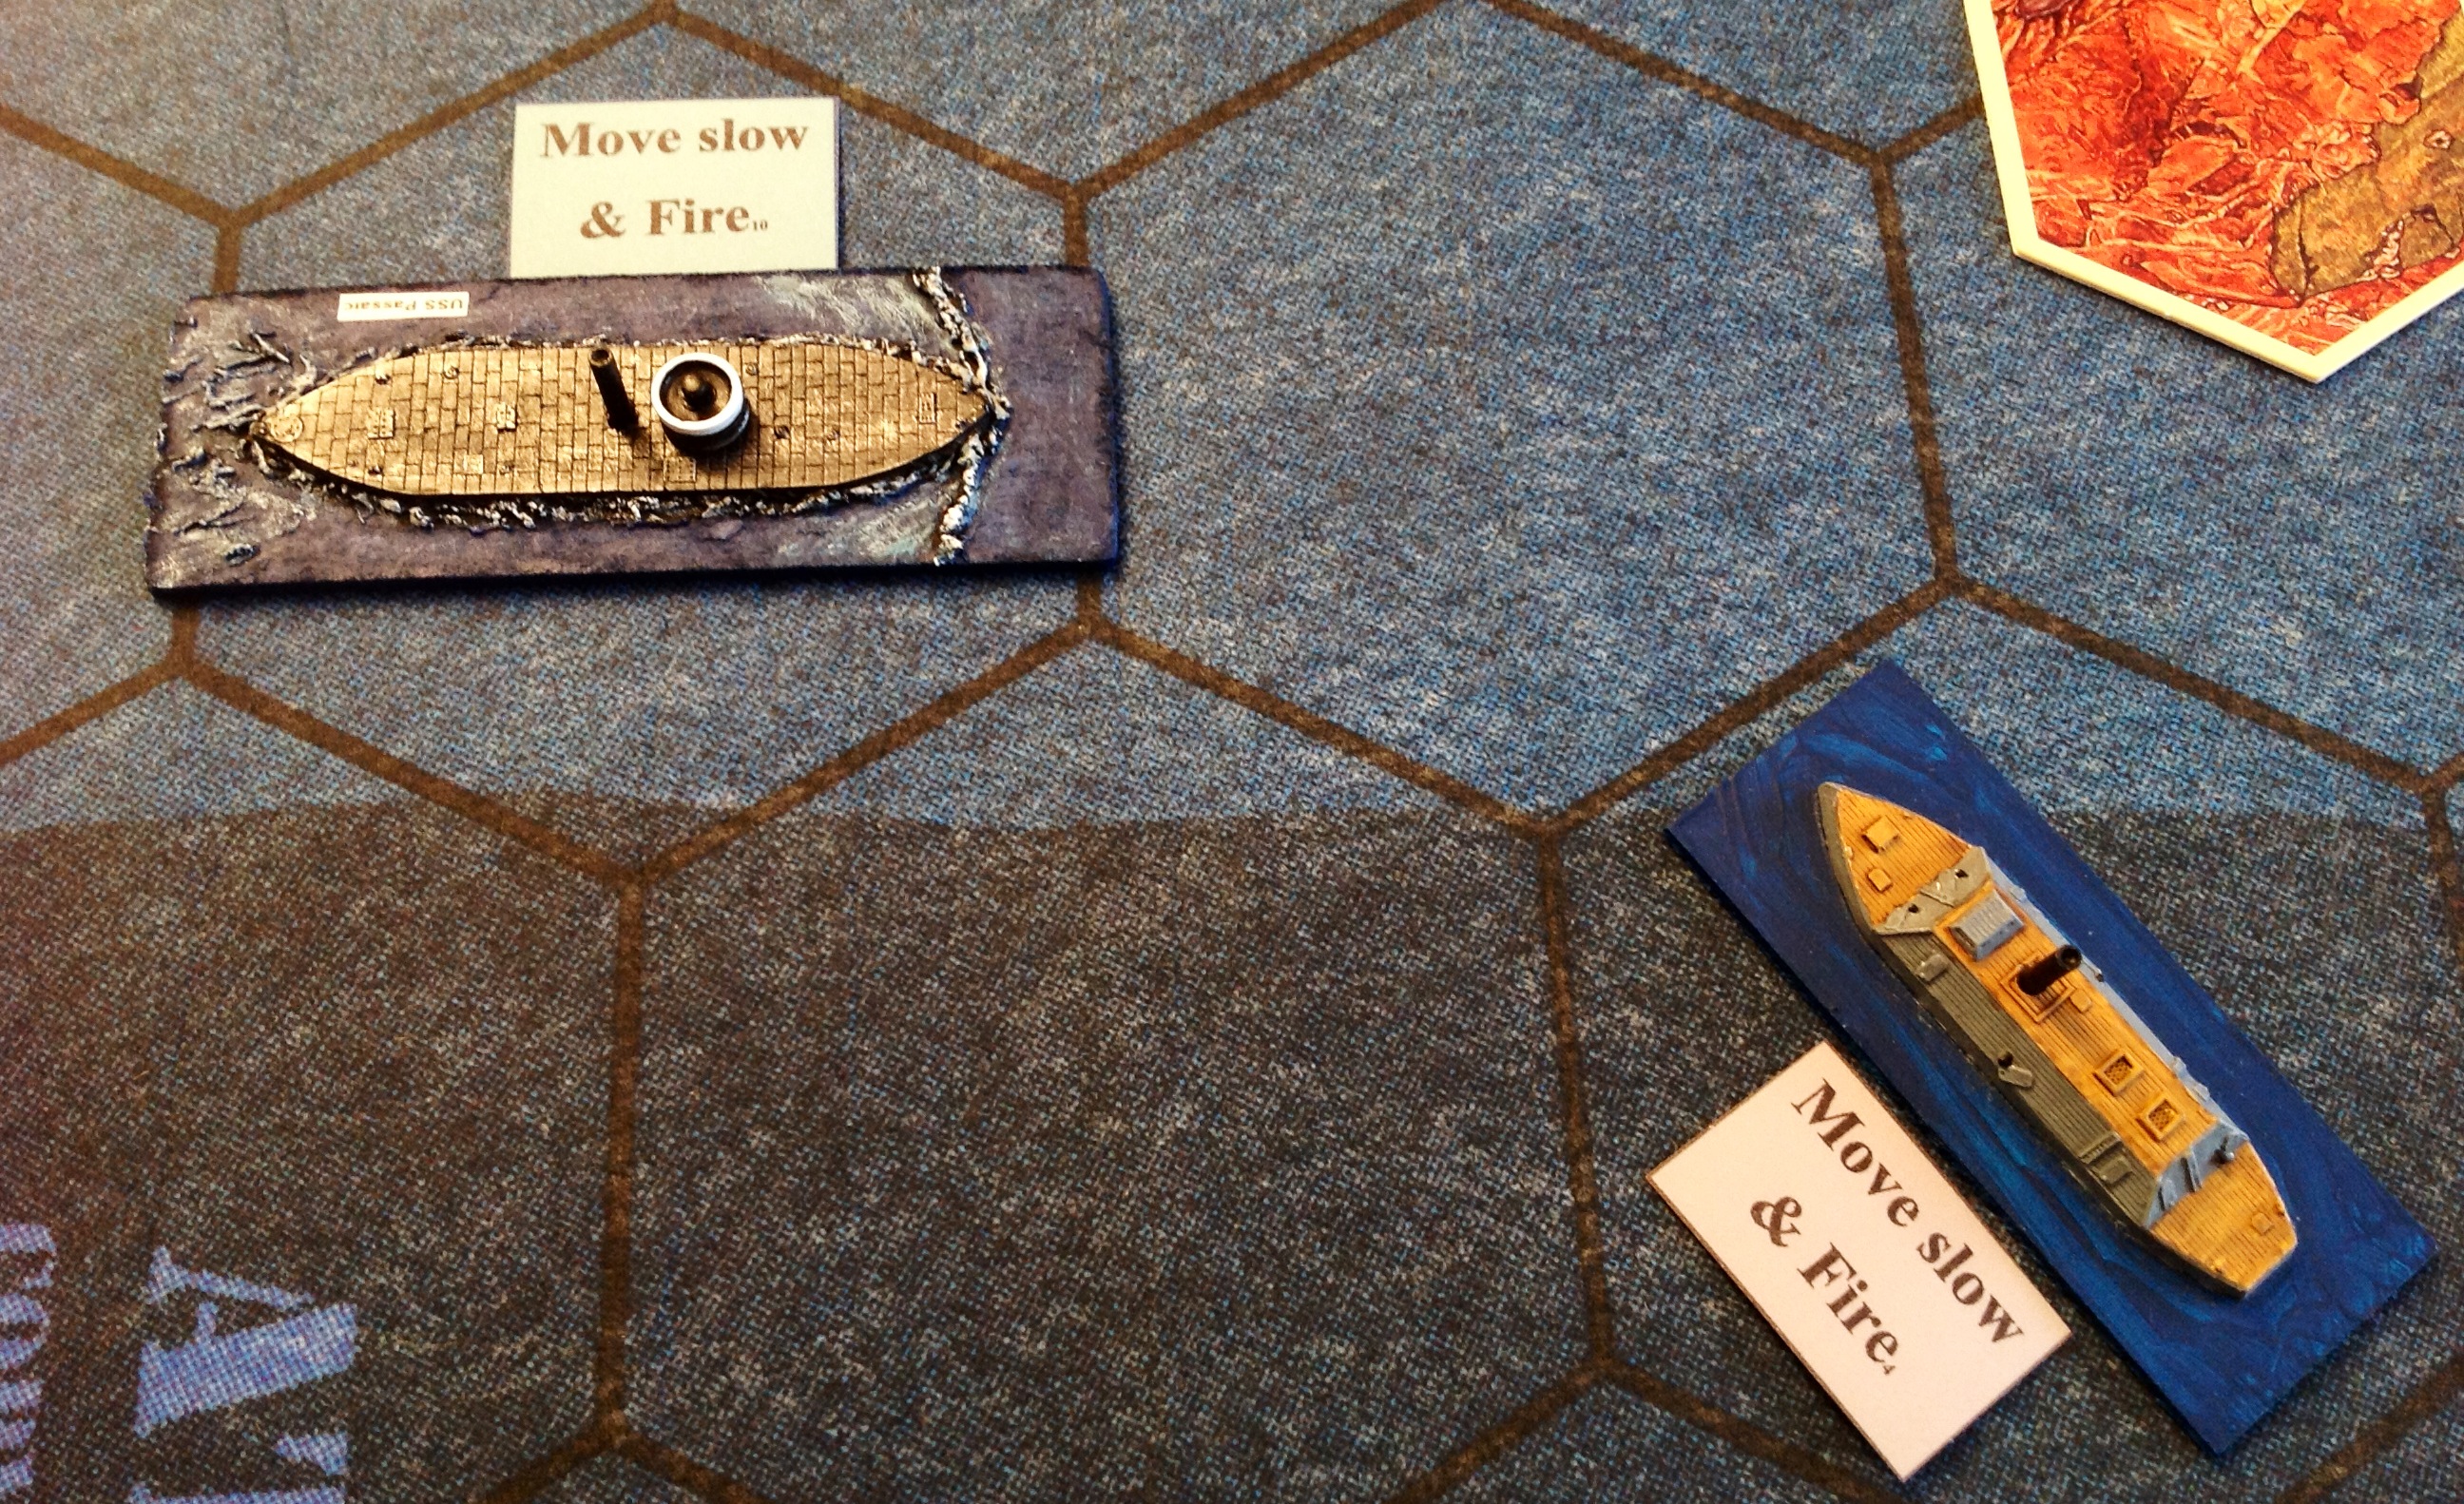
That’s a LOT to remember 🙂 Each ship draws 5 order cards when it arrives and we’ll look at what these contain during the game – however, though the 5 cards can be played 1 per turn in any order you want, they are drawn randomly so may not be the selection you want. Additionally there are 2 different decks and you must draw all your initial 5 cards from the same deck – one deck has mostly movement orders with some firing on them and the other deck has mostly firing orders with some slower movement orders on them. When you get down to 1 card (i.e. after 4 turns in the game) your ship can draw more cards which can be all from the deck itu started on or a different one – with a game lasting 8 turns on average, which card deck you settle on at the start is really important.

Fort strikes it lucky
With the scenario set up and victory conditions determined, it was on to turn 1. There is a fixed sequence to each turn, but before any orders are placed forts are allowed to fire. The Rebel fort was placed on an island and had the Union arrival edge well within its front fire arc, so chose to fire at the USS Commodore Morris – a wooden ship and thus a softer target. The fort rolls for the total number of guns in the fort (not the arc – so 5 in this case) and any roll of 5 or 6 allows a gun in the arc to fire. The fort rolled enough to allow the 2 heavy and 1 medium gun in its front arc to fire. You roll for 1 gun at a time, starting off with 4D6 base, then adding 2D6 for a heavy gun, but subtracting 1 for the target being a narrow target as it was bow on to the fort having just arrived on the table. Each 5 or 6 on a D6 causes a hit – 5 hits were scored and as this took the hit points through a multiple of 5 (18 down to 13) a critical hit roll was made, resulting in a fire on board – not good on a wooden ship! A fire immediately causes another 1D6 of damage, and a roll of 5 meant another critical roll had to be made – disaster – the fire had destroyed the front gun! Lesson 1 – keep wooden ships out of the front arc of forts on turn 1!
Each ship then had an order card placed next to it (face down if against a live opponent) and a D6 rolled to see who goes first – the winning side then gets to activate a ship then the losing side activates in turn until all ships have used their order card.
Ironclads trade blows
The Rebs won the roll so activated their ironside on the table, CSS Arkansas – it had a “move slow and fire” order so was able to bring the doomed Commodore Morris into its broadside arc by moving forward 1 hex. Rolling 3 dice the Arkansas scored 3 hits and another critical took out the pilot house, stopping it moving until this was repaired, though this repair would not be attempted until after the raging fire on board was put out. The Union activated the ironclad Passaic with the same order and fired its 2 heavy guns at the Arkansas. It also scored 3 hits but because the Arkansas is an Ironclad it saves hits from heavy guns on a 5 or 6 – one save resulted in 2 hits which were crossed off on its ship card. The Reb gunboat CSS Hampton was activated next and it moved 2 hexes on a slow order as it was a fast ship but was still just out of range so couldn’t fire. The other Union ironclad USS Nahant activated, moved 1 and fired at Arkansas’ stern, but missed completely on 10 dice!
As all the Confederate ships had activated, the Union carried on and activated the luckless Commodore Morris. Because she was on fire the crew could attempt to put the fire out before moving or firing, and needing 4,5 or 6 to succeed they rolled a 3 – the fire then immediately caused more damage and a roll of 5 sent the hit points to 0 and the ship to the bottom of the river – first blood to Dixie!

CSS Hampton
With all ships activated (or sunk!) the turn marker was advanced, but there is a twist here – if 1 player rolls a 5 or 6 and the other player doesn’t, the can add or subtract 1 to the next game turn. The Rebs won this roll as well, so it was suddenly turn 3. Ship arrivals were then diced for, the Rebs needing 9+ rolled a 12 on 2D6 so onto the table at their end steamed another ironclad, CSS Palmetto State, heavily armoured and toting 4 heavy guns – it was not the Union’s day! The Union could automatically bring on their ironclad, but chose to bring on a large wooden ship instead, USS Sassacus. They also got to roll for late ships arriving, but only rolled an 8 needing 9+. They could re-roll one of the dice and got this up to a 9 by the re-roll, but couldn’t bring on the ironclad as they had re-rolled – luckily they had a wooden ram in reserve (USS Switzerland) so on it came. End of turn 1 and VP were at Confederate 1D6 + 2 for fort + 6 for sinking Commodore Morris – 8VP+1D6 – the Union had still to score.

Sassacus arrives
On to turn 3. The fort got lucky once again, hitting the newly arrived USS Switzerland and setting it ablaze. The Rebs also won initiative on turn 2 which is just as well really as the blazing USS Switzerland was lined up for a ram on the Arkansas port bow. With a move slow & fire order, the Arkansas was able to turn bow on to the Switzerland and open up with her forward guns, while at the same time broadsiding the USS Passaic – there’d be hell to pay on the Union turn but at least the ram was avoided for the minute. As the Arkansas had moved within 1 hex of both the Passaic and Switzerland they got a chance at opportunity fire – basically each eligible gun rolls a D6 and is able to fire at full effect on a 5 or 6. The Switzerland had only 1 gun, which failed to opportunity fire, but the Passaic had 2 guns, and 1 managed to fire – rolling 7 dice not one scored a hit! In reply, Arkansas’ front battery of 2 medium guns inflicted 6 hits on the Switzerland and her broadside inflicted 3 hits on the Passaic after saves. That meant another critical roll on the Switzerland and a first one on Passaic – Passaic’s 2D6 roll was 9 – a pilot house hit which would prevent movement if not repaired when the ship was activated. The Switzerland rolled another fire, so this was ignored.

Arkansas attacks
Passaic activated for the Union and repaired the pilot house (that was quick!) – she also had a move slow & fire order, but Arkansas would get an opportunity shot with her heavy guns as the Union ironclad sailed past – luckily for Passaic, the enemy crew were still reloading after their broadside so the chance was lost. The Arkansas took 4 unsaved hits from Passaic, causing a roll on the critical table in which her starboard heavy gun was destroyed.
Down river, CSS Palmetto State sailed full steam ahead towards the action, while back in the action, USS Sassacus moved forward slowly in order to keep Arkansas in her broadside arc – her broadside caused another 2 hits on the Arkansas. With only the gunboat CSS Hampton left to activate, the Rebs moved it forward slowly and took a pop at Sassucus with her forward medium gun but failed to score a hit. The Union succeeded in putting out the fire on Switzerland, but her ramming run on Arkansas had been thwarted and she scraped along the side into the next hex causing no damage – as she passed on the starboard side where the heavy gun had just been lost, the Arkansas couldn’t opportunity fire, but as the Switzerland ended up astern, the rear battery of mediums could attempt a shot and did, causing the loss of another hit point.

CSS Palmetto State
The last Union ship to activate was the Nahant and she sped towards the shore objective buildings meaning to bombard them – her movement took her within opportunity fire range of the fort (2 hexes for forts) but the fort’s medium battery’s shot bounced off her thick armour. In response the Nahant reduced one of the buildings to matchwood with 4 hits when 4 were needed (though only 1 building or river objective can be targeted per turn so any excess hits would have been wasted). The turn ended with no-one able to influence the next turn number, so turn 4 it was – however the Rebs got lucky again, rolling a 9 for ship arrivals so next turn the CSS Governor Moore would be arriving – even with the Keokuk arriving the Union was going to be in difficulties, though at least they had scored D6+2 victory points in the turn for destroying one of the objective buildings. The score at the end of turn 3 was Confederate 8VP+1D6 against the Union 1D6+2 – hard to remember isn’t it? Though it doesn’t say in the rules when the variable victory points are to be rolled, I like to know where I stand so at this point rolled the variable VPs and came up with Confederate 10VP – Union 3VP (though with the USS Switzerland on the verge of sinking which would give the Rebs another 6VP).
To be continued….
